5. Flash Images
❶ Open RKDevTool\RKDevTool_Release\RKDevTool.exe
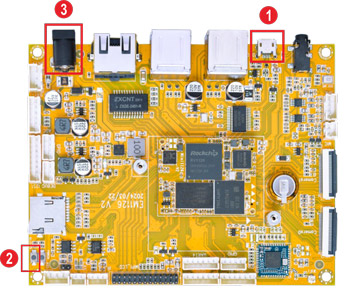
❷ Connect PC and development board with Micro USB cable, keep pressing the Recover Key and power up until the windows PC shows Found one LOADER Device, then release the key.
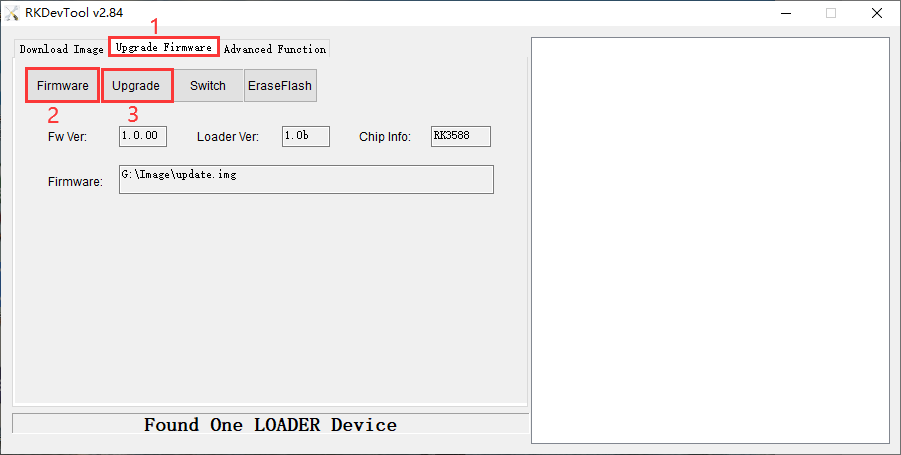
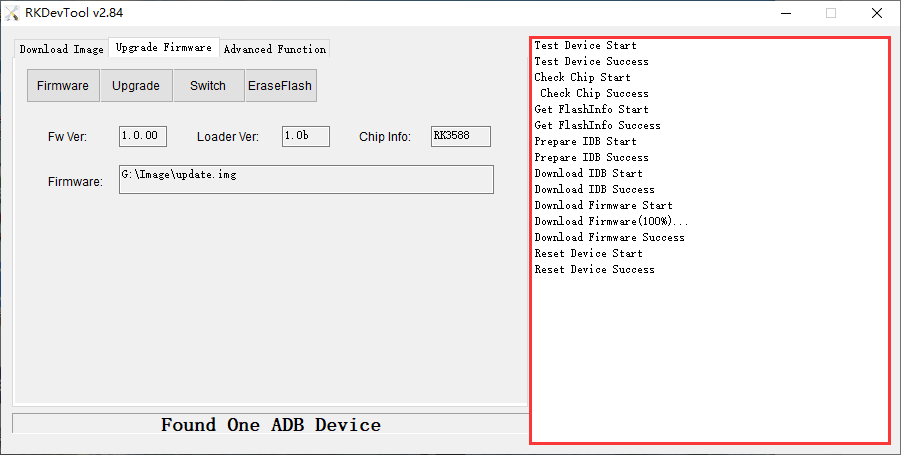
❸ Click Upgrade Firmware -> Firmware, select
update.img. Click Upgrade to flash.
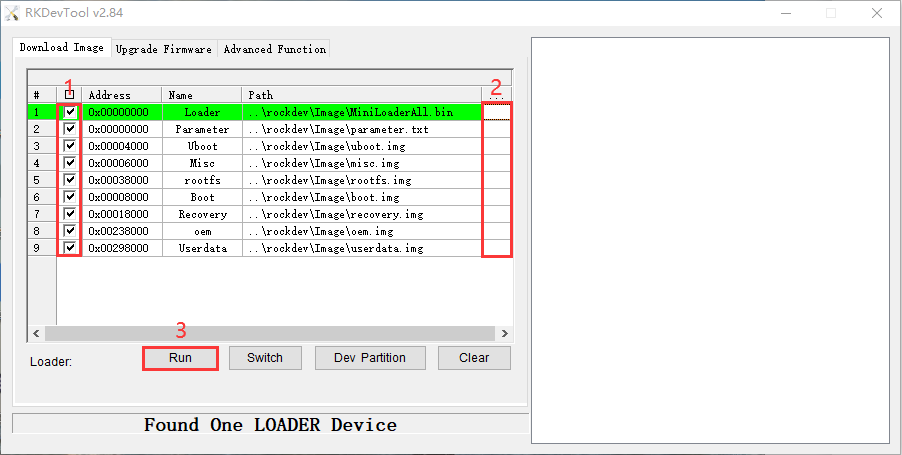
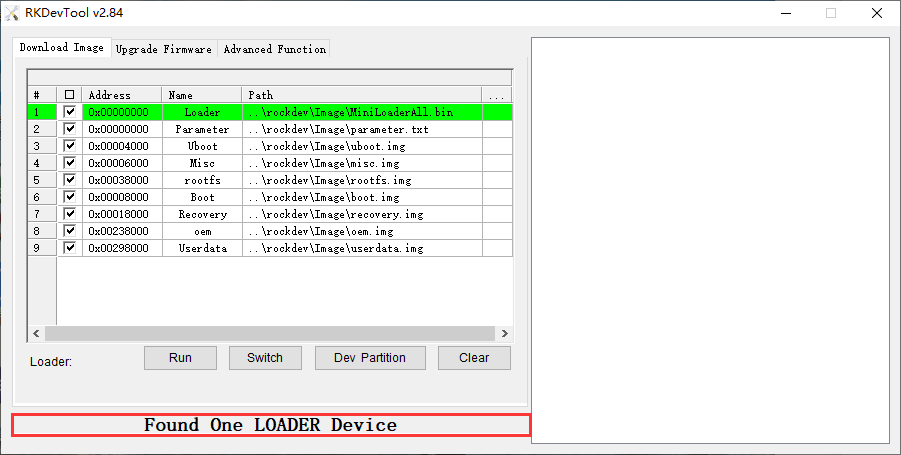
User can also update the firmware separately.
❶ Select the checkbox on the left.
❷ Click the column on the right side for the path of the file want to flash.
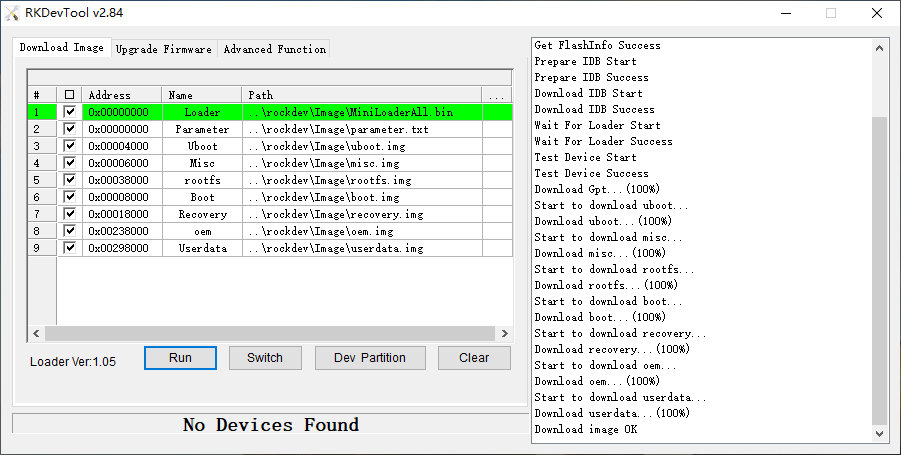
❸ Click Run to flash the image.