Please refer to the document
EM210 Burning Guide(Android4.0.3).pdf
EM210 Burning Guide(WinCE6.0).pdf
EM210 Burning Guide(Linux).pdf
Products
- -Single board computer
- +Rockchip
- SBC3588 Idea3588 Idea3588S Idea3576 SBC3576 EM3576 SBC3568 EM3568 EM3568-AV CAM SBC3566 EM3566 EM3562 EM3326S Idea1126 EM1126 SBC3399 Idea3399 EM3399 Idea3288 EM3288 EM1808 EM3128 EM1103B SBC1108
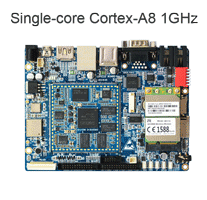
* Processor: Samsung ARM Cortex-A8 S5PV210AH, 1GHz
* RAM: 512MB
* Storage: 4GB
* Interface: 2x USB Host, 1x USB OTG, 1x RS232, 2x RJ11, HDMI, GPIO, LCD, Ethernet, Camera, 3G, micro SD card, SIM card, JTAG, Keyboard, Audio
* Operating system: Linux 3.0.8, WinCE6.0, Android 4.0.3
* Dimensions: 141 x 108 mm
* Expansion Module: 3G model, GPS, WiFi, Camera, LCD
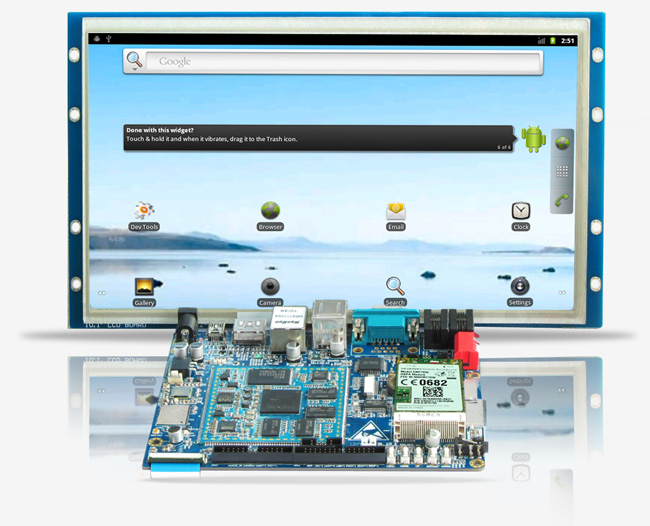
The Boardcon EM210 integrates a high-performance, low-power 1GHz Samsung ARM Cortex-A8 S5PV210AH with Samsung K4T1G164QF chipsets and Samsung KLM4GIFE3B, delivering best performance-per-watt for communication, healthcare, automation, transportation, multimedia advertising, high performance POS machine, and surveillance applications.
The compact EM210 offers a rich set of peripherals and interfaces including Ethernet, USB Host &OTG, Camera, HDMI, Serial ports, Audio, LCD, Keypad, T-Flash, Buttons and etc. It brings a flexible array of communications options including Wi-Fi, WCDMA and RFID. A SIM card slot is also included. Supporting Linux 3.0.8, WinCE6.0 and Android 4.0.3, the EM210 can deliver a variety of features and APIs that allow developers to highly customize their system designs in the low-profile and fully-configured embedded devices.
The single board computer has complete electronic documentation, schematics, demo applications, and third party industry-standard C compilers and embedded development environments for evaluation. We are sure to have the right single board computer for your applications.
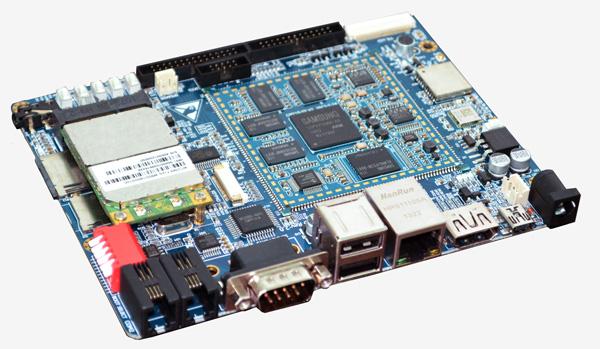
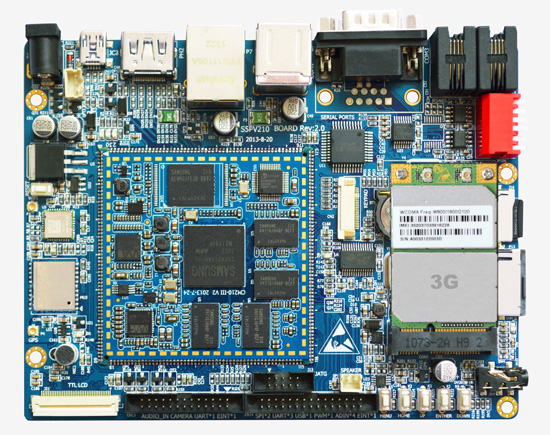
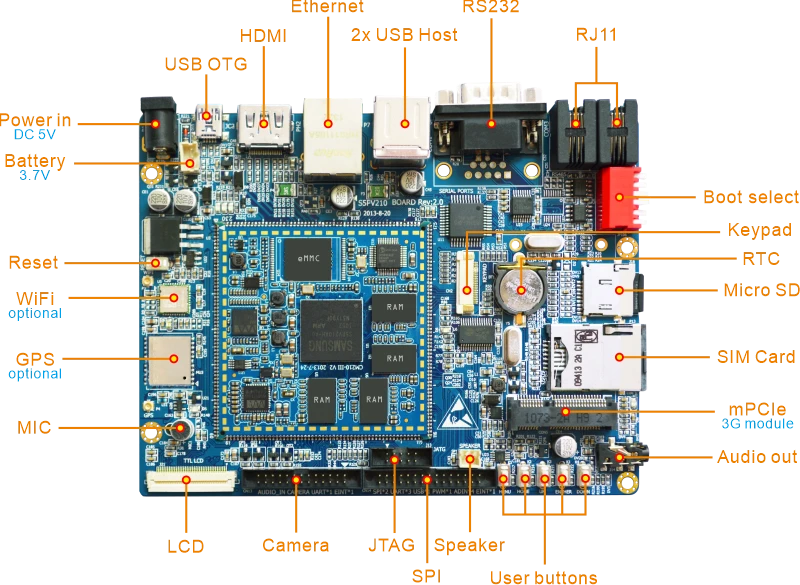
| Specifications | |
|---|---|
| SoC | Samsung ARM Cortex-A8 S5PV210AH @ 1GHz |
| GPU | PowerVR SGX540 @ 200MHz |
| Memory | 512MB DDR2 |
| Storage | Default 4GB eMMC. 256MB ~ 4GB NAND/eMMC optional MicroSD card slot |
| Power | 5V/3A DC input jack 3.7V Li-battery connector |
| Serial Ports (UARTs) |
COM-0, five-wire DB9 RS232 serial port COM-1, four-wire RJ11 serial port (RS232/RS485) COM-2, four-wire RJ11 serial port (RS232/RS485) |
| Display | 4.3", 7", 10.1 TFT LCD with capacitive/ resistive touch HDMI V1.3, 1080p@30fps |
| Audio | Adopt WM9713 Audio chip. 1x 3.5mm jack for audio output 1x 2-pin connector for speaker 1x MIC for Audio input |
| Connectivity |
10/100 Mbps Ethernet RJ45 port via DM9000AEP controller
Optional 802.11 b/g WiFi module Optional 3G module via mini PCIe socket + SIM card slot Optional GPS module |
| USB | 2x USB2.0 Host, 1x USB2.0 OTG |
| Camera(optional) | 1x 20-pin CMOS camera interface |
| JTAG | 1x 10-pin JTAG Port |
| Keyboard | 6*7 Keypad interface |
| RTC | Real Time Clock, powered by external lithium battery |
| Expansion | 1x USB Host, 1x PWM, 4x ADC in, 3x UART, 2x SPI and 1x EINT via 30-pin header |
| Dimensions | Based board - 141 x 108 mm; CPU board - 61.55 x 59.9 mm |

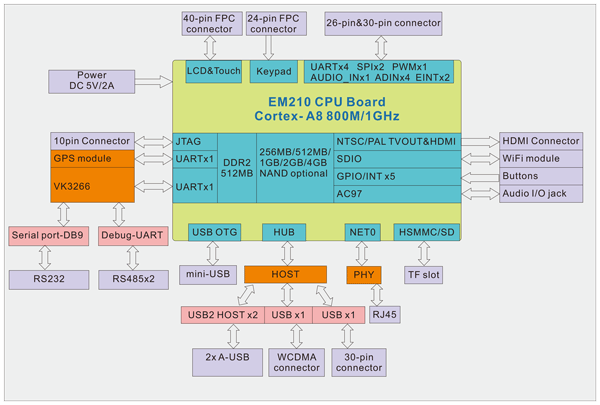

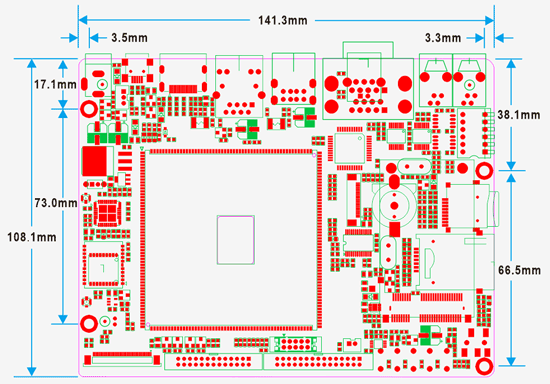
| OS | Item | Feature | Description |
|---|---|---|---|
| Linux3.0.8 | Bootloader | Boot | Start up system, supporting one Key to update Bootloader, Kernel, Yaffs, and one Key to configure parameters of Linux. Also can be configured the board booting from Yaffs or NFS |
| Tftp | Support tftp transmitting protocol | ||
| File system | Yaffs | ||
| Kernel | Support writing kernel image into nand flash and kernel parameter setting | ||
| Etc. | Support via USB and Serial Interface to download application to flash debug | ||
| Kernel | Version | Linux kernel 3.0.8 | |
| File system | CRAMFS/RAMFS/EXT2/FAT32/NFS/YAFFS/YAFFS2 | ||
| Serial | serial driver | ||
| Ethernet | 10/100 MbpsDM9000 | ||
| RTC | RTC driver | ||
| USB Host | USB Host, USB Slave driver | ||
| Buttons | User buttons | ||
| LCD | Coming with driver for 4.3", 7" TFT LCD | ||
| Touch panel | Touch panel driver | ||
| SD card | SD card driver | ||
| Sound | WM9713 | ||
| Camera | CMOS/CCS Camera driver | ||
| USB Camera | The chip of USB Camera is Vimicro 301p, the USB Camera is collecting dynamic picture and showing on the LCD | ||
| WCDMA Module | Using WCDMA Module to dial-up to Ethernet | ||
| Embedded GUI | Qt/Embedded | Qtopia 2.2.0 | |
| Application | Servfox | The application is running under Console platform, it controls the USB Camera by internet and displays the picture taken by camera on the LCD. It can be taken as net monitor when the application works with USB Camera. | |
| Spcacat | It is a camera picture capture application under Console platform | ||
| Snapshot | It is a LCD picture capture application under Console platform | ||
| Rz and sz | It is a application that transfer and receive file by serial port | ||
| Madplay | It is a MP3 player | ||
| Network protocol | TCP/IP | TCP/IP protocol | |
| Telnet | Telnet server, telnet remote login | ||
| File transfer | FTP Client/server | ||
| Web server | BOA Web Server | ||
| USB port supported Devices | U-disk, portable hard-disk, USB mouse, USB Keyboard, USB HUB, USB Camera and so on. | ||
| Command | cat, chmod, discard, echo, flashsd, flashwrite, free, genhtml, hostname, init, kill, loader, ls, mkdir, mount, ps, reboot, rm, smanaged, sysconf, yes, insmod, lsmod, rmmod | ||
| Tools | busybox1.13 (provided in the CD-ROM) | ||
| OS | Item | Feature | Description |
|---|---|---|---|
| WinCE6.0 | Bootloader | BL1_UART.nb0 | The first serial guide,not burn into Nand flash |
| EBOOT.nb0 | The second serial guide,not burn into Nand flash | ||
| bootimage.nb0 (stepldr+Eboot) | Include stepldr and eboot, burn into Nand flash 1. USB download: update the image via USB OTG 2.0 2. Format Nand Flash 3. Format BinFS 4. Low-level Format 5. Set boot-up delayed time 6. Booting process bar |
||
| uboot.bin | Use to format the nand flash | ||
| System | Drivers | 7" Touch Screen | |
| SPI, Camera, USB Host, USB OTG, IIC, WIFI, GPS, JPEG, SD/MMC/SDIO, DMA, MFC, Keyboard, Serial ports, AC97, OpenGGLES1.1&2.1/D3DM | |||
| Application | Software features | Source code and test program for MFC, Camera, JPEG, OpenGLES1.1 & 2.0 |
| OS | Item | Feature | Description |
|---|---|---|---|
| Android4.0.3 | Bootloader | Uboot-1.3.4 | Main functions: 1.Support Nand Flash erase/write/read 2.Support USB download Image 3.Support print, set, save Environment Variables 4.Support memory's contents display/compare/modify 5.Support bootm, bootargs setting |
| USB Installer.bin | Uboot boot process, download uboot by the process | ||
| Image update | Support updating image from SD card or USB | ||
| Kernel and drivers | Kernel version | Linux 3.0.8 | |
| Drivers | Serial ports, RTC, 4.3/ 7/ 10.1 inch LCD including Touch Screen, SD, USB Host, USB OTG, LEDs, AC97, Keyboard, 3-axis accelerometer, PWM, IIC, SPI, MFC, TVOUT, HDMI, JPEG, WIFI, WCDMA, GPS, DM9000 | ||
| File System | File System | Yaffs File System | |
| Embedded GUI | Android4.0 | Support file browser, Mediaplayer, Calendar, time, counter, Touch Screen Calibration program, Plug-in manager. | |
| Network protocol & application |
Network Protocol | TCP/IP protocol, Telnet, FTP Client/server, boa web server | |
| Application | Alarm Clock, Browser, Gallery, Calculator, Camera, Phons, Email, Maps, ES File Explorer, Mediaplayer, Music, Picsay, ASTRO | ||
| Cross compiler Environment | Arm-2009q3.tar.bz2, JDK1.6 | ||
| Debug Tools | DNW, MoviNAND_Fusing_Tool.exe, VmWare7.0 | ||
| Datasheet |
|
|
|
|
| Reference Manual |
|
|
|
|
|
|
|
|
|
|
|
|
| Expansion Module | Module Detail | Linux | Android | WinCE |
|---|---|---|---|---|
 WiFi Module WiFi Module |
WM-G-MR-09 Module inside, supports IEEE 802.11b/g | √ | √ | √ |
 COMS Camera COMS Camera |
3.1 Megapixel, OV3640 | √ | √ | √ |
 GPS Module GPS Module |
thinkstar GPS Module, TS-750CLPx | √ | √ | x |
 3G Module 3G Module |
ZTE MF210 WCDMA Module | √ | √ | x |
If you order the kit or any question, please feel free to contact us at market@armdesigner.com
Transmit tools file "busybox" to board by USB OTG
1. Power on the board, link PC through USB OTG, open cmd.exe and type command
adb push busybox /system/bin
2. Input these command on the board console
# chmod 777 /system/bin/busybox
# busybox vi /etc/install-recovery.sh
(Edit install-recovery.sh, as follow) #!/system/bin/sh
busybox ifconfig eth0 down
busybox ifconfig eth0 hw ether 00:11:22:33:44:55
busybox ifconfig eth0 up # chmod 777 /etc/install-recovery.sh
Save and quit, reset the board.
To change the runtime OS feature you will need the WinCE Platform Builder 5.0 (for WinCE5.0)/Visual Studio 2005 for WinCE6.0, as well as the BSP (board support package) that we provided in the shipped DVD. For application development you can use the EVC (Embedded Visual C++).
There are evaluation versions of the above mentioned tools available on the Microsoft download site, full version of those tools can be bought from a local Microsoft distributor.
Be sure to copy it to the folder "Resident Flash".
There are three ways to achieve this:
1, Add the application (MyApp.exe for example) and its shortcut to the NK, and add the shortcut to the StartUp folder;
2, Add the application to the NK and add something like below the registry:
[HKEY_LOCAL_MACHINE\init]
"Launch80"="MyApp.exe"
"Depend80"=hex:1E,00
3, By modifying the registry we can even replace the shell (explorer.exe), for example:
[HKEY_LOCAL_MACHINE\init]
"Launch50"="explorer.exe"
"Depend50"=hex:14,00, 1e,00
replace the "Launch50"="explorer.exe" with "Launch50"="MyApp.exe" so that we can disable the explorer and set our own application as the default sheel.
MTD partition is defined in the file "arch/arm/plat-s3c/include/plat/partition.h", you may modify the partition information by modifying this file.
Normally such "bad blocks" are not real bad blocks. These blocks can be marked as bad blocks due to some faulty operations. Generally we can have this solved by running the "nand scrub" command in the uboot prompt, note that "nand scrub" will erase everything in your NAND, so please be sure to backup your data before doing this. Anyway, a few "real" bad blocks in the NAND Flash is normal and allowed and they would not effect anything.
There are two possibilities:
1. The kernel image (zImage) has not been well installed.
In this case you just need to follow the user manual to install the zImage.
2. Incorrect u-boot parameter.
Is it possible to move my application software into the on-board NAND flash instead of CF/SD?
There is already a rootfs (rescue rootfs) in NAND flash for our every board. Surely you can use on board NAND flash, our boards leave a big part of Nand Flash for the user's application. The board user manual writes detailed steps for burning vivi, image to Nand Flash, SD Card.
With this case please calibrate the touchscreen again according following steps.
1.#rm /etc/pointercal
2.Reset the board
3.The system will show you a window with cross-point to calibrate the touchscreen
You need to prepare a logo image (png format), such as the name of linux_logo.png, please run under the linux: The settings are shown as the following directory.
# pngtopnm linux_logi.png > linux_logo.pnm
# pnmquant 224 linux_logo.pnm > linux_logo224.pnm
# pnmtoplainpnm linux_logo224.pnm > logo_linux_clut224.ppm
Finally will be generated a file of logo_linux_clut224.ppm, then replace the file in the directory" \drivers\video\logo\logo_linux_clut224.ppm", and begin to recompile.
Actually boot animation under the Android is formed by plenty of pictures take turns to play.
First of all, make bootanimation.zip according following steps.
1. Edit the file "desc.txt" under the Linux
800 480 2
p 1 0 part0
p 0 0 part1
Create two new folders such as "part0" and "part1", then put the images (PNG) into the two new folders "part0" and "part1" according to the broadcast order respectively.
2. Packaging under the window. Select the files of "desc.TXT", "part0", "part1", choose "zip" compressed format, please select "storage" compression way. (On the other hand, you can also execute the command "zip" to packag under the Linux)
At last, move the file "bootanimation.zip" to the directory of "system/media" or "data/local".
For WinCE, users only need to choose according to their own LCD screen display resolution modify the macro definition of different screen in the file "bsp_cfg." under the directory "\SRC\INC".
For linux QT, execute the command "make menuconfig", then setting according to the following directory "Device Drivers -> Graphics support -> Support for frame buffer devices" , select the corresponding LCD Type. Please refer to the corresponding user manual for details.
For Android, If you are switching between resistive screen, you can modify the parameters of LCD in the bootargs under the uboot environment variable. If you are switching between the resistive and capacitive touch panel screen, you need to execute "make menuconfig" in the kernel, then setting according to the following directory "Device Drivers -> Input device support -> Touchscreens" , select the appropriate option to configure.
After calibrate Touch of board, click "Start" - "Suspend" to sleep to save setting.
Reset/Re-power the development board can found the setting has taken effect.
Please refer to EM210 3G Settings Instructions.pdf


